
BlueConic plugins are implemented using files containing the plugin XML definition and JavaScript. The files that make up a plugin must have a specific file/folder structure depending on how it will be added to your BlueConic deployment. There are two methods to add a plugin to BlueConic:
- The first method is to upload the plugin file/folder structure to a server reachable by a URL. After you have done so, you can add the plugin by entering the URL into BlueConic.
- The other way is to add the plugin files to a ZIP file and upload it to the server on which BlueConic is running.
Both methods are described in the following sections. Once you have created the plugin and made it available using one of the two methods described below, you must register it in BlueConic. This is done in the"Plugins" tab in the Settings page in BlueConic.
Method 1: Add a plugin that is available at a URL
In this implementation, a plugin is uploaded to a server that is reachable for the BlueConic Server by a URL. This method of adding a plugin to BlueConic supports multiple versions of the plugin located in the same folder structure.
BlueConic recommends that each version of a BlueConic plugin consists of the following files:
- index.xml - an index file that points to the location and filename of the plugin's XML implementation.
- [plugin name].xml - The XML definition file contains the tags that define the plugin.
- [plugin name].js - contains the implementation of JavaScript logic for the plugin.
BlueConic recommends that the files defining a BlueConic plugin be arranged in the following directory structure:
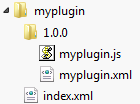
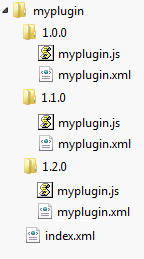
In this example, the name of the plugin is "myplugin". It contains one directory for the 1.0.0 version of the plugin. In the 1.0.0 directory is the implementation of the plugin contained in two files: "myplugin.xml" and "myplugin.js". The file "index.xml" defines the location and name of the XML file that defines the plugin. BlueConic plugins can also contain multiple versions in this arrangement: this allows you to be able to increment the version number of a plugin as it is modified over time. For plugins that contain multiple versions, the directory structure would be as follows:
Index.xml tags
The following shows an example index XML file for a plugin named "myplugin" with three versions (as in the illustration above):
<?xml version="1.0" encoding="UTF-8"?>
<plugin>
   <id>myplugin</id>
   <name>My Plugin</name>
   <versions>
     <version location="1.0.0/myplugin.xml" />
     <version location="1.1.0/myplugin.xml" />
     <version location="1.2.0/myplugin.xml" />
   </versions>
</plugin>
Publish the plugin files
Now that you have created the directory structure with plugin files, you have to expose it to the outside world via a URL. For this, you will need access to a web server to place the files. You typically place the files with ftp or scp. Try requesting the index.xml in a browser to see if you can access the file via a URL.
If you do not have access to a server where you can place the files, you can use a service like ngrok.com to expose a local web server to the internet. Place your files on a local web server and expose it with ngrok. Try requesting the index.xml in a browser to see if you can access the file via the ngrok URL.
To add a custom BlueConic plugin, follow these steps:
- Click the Plugins tab.
- Click Add/Update Plugin.
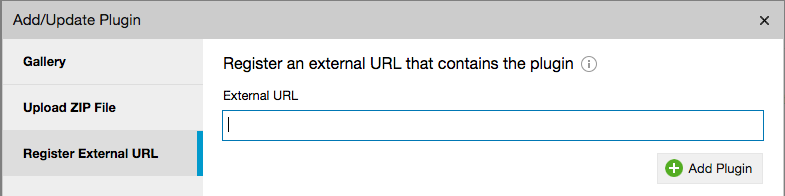
- Select "Register External URL" and then enter the URL of the plugin in the "URL" text box.
- Click Add Plugin.
The new plugin will be analyzed to ensure it is valid. On success a green checkmark will briefly be shown indicating that the plugin has been added. On failure a red icon will appear and the plugin will not be installed.
Method 2: Add a plugin contained in a ZIP file
A plugin can be added to a BlueConic server by uploading a ZIP file containing the XML definition file and the JavaScript file, as well as any other supporting files. To do so, create the BlueConic plugin following the instructions in the topics available in the tabs along the top of this topic. Once your plugin is ready, add the plugin files to a ZIP file. The files/folders within the ZIP file must conform to the following rules:
- The XML definition file for the plugin must be present in the root of the ZIP file and must be the only XML file in the root;
- The JavaScript (JS) file can be in the root of the ZIP file or in a subdirectory;
- Any other supporting files can be in the root of the ZIP file or in a subdirectory;
- The ZIP file contains only one version of the plugin (multiple versions are not supported).
If you upload a newer version of an existing plugin in a ZIP file, it will overwrite the existing plugin if the <id> tag in the XML definition file is the same as the existing plugin. If you use a different identifier, both versions of the plugin will be available to BlueConic.
To add a custom BlueConic plugin via a ZIP file, follow these steps:
- Click the Plugins tab.
- Click Add/Update Plugin.
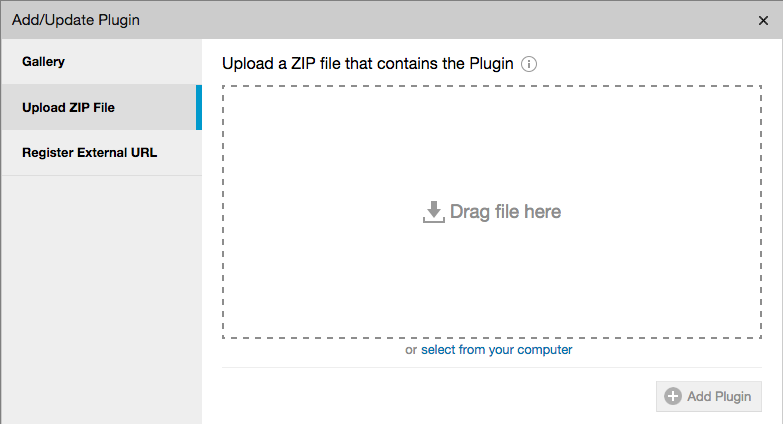
- Select "Upload ZIP File" and then click select from your computer to browse for the ZIP file. Select the ZIP file and then click Open. Alternatively, drag the ZIP file from the folder on your computer to the marked field and drop it there.
- Click Add Plugin.
The new plugin will be analyzed to ensure it is valid. On success a green checkmark will briefly be shown indicating that the plugin has been added. On failure a red icon will appear and the plugin will not be installed.