
Behavior listening and form listening represent half of the most frequently used BlueConic Listeners. The other half are Scoring and Interest Ranking Listeners. As with form listening and behavior listening, using Scoring and Interest Ranking listeners involves the following steps:
- Creating, or selecting, a profile property to populate with information.
- Setting up rules to define what information lands in that profile property.
Let's take a look at the Scoring and Interest Ranking Listeners in BlueConic.
We'll use our demo publishing site, taylor-news.com as an example. We'll listen for content categorization today, but hopefully it will be clear that you can take the same approach for listening to product categories and site or application features in non-retail scenarios.
For today's tutorial, we have two use cases. Since this is a Listener tutorial, the supporting data is more interesting than the use cases themselves:
Use case #1: Applying relevancy targeting to drive newsletter conversions
We have various content-based themes for a newsletter signup form on our home page. We would like to show relevant themes for our ads, based on users' content interests. In order to do that, we need to know what content they are interested in. This is what interest ranking listener are for, so we'll show you how to set one up.
Use case #2: Acquiring qualitative data from highly engaged readers
An overhaul to our example site's Technology section is coming, and we want to ask our most engaged tech readers a few questions. Their responses will guide our decisions and inform us about user preferences. In order to prompt the right users, and leave the others alone, we need to know how engaged with technology content these users are. We'll set up a BlueConic Scoring Listener to collect this data.
Choosing profile properties
As noted in the intro, we need to start by creating or selecting profile properties to store our data. We'll start with the Ranking Listener, and we'll create one profile property to hold the top three sections a user is interested in. For example, a user might have a property value of:
"Sports","Technology","Lifestyle"
This indicates that the user has shown an interest in all three categories, and is most interested in sports content, followed by tech and then lifestyle content.
To create the first profile property, follow these steps or skip down to the next image and try to match your configuration with ours.
- To start, open to the Properties > Profile properties tab and click Add profile property.
- Enter a unique identifier (ID) for your profile property. Think of this as a short name -- but remember that only alphanumeric characters, underscores, and hyphens are allowed. We'll choose "top_sections" here.
- For the name field, you have more freedom to include spaces and other characters. This is the name that will be displayed for the profile property throughout BlueConic.
- Enter a description that includes supporting information that allows other BlueConic users to understand why the profile property exists.
- Check the box next to "Type", and change the filter type to "Text".
- Add some labels for the property in the metadata section . Not sure how you'll use labels for categorization/organization yet? Try just entering "content" for now. You can always change or add to this later.
- Save your changes.
Here's the property we just configured. Yours should look similar to this:
Next we get to configure the Interest Ranking listener to populate that property. Save your property, open the Listeners tab, and click the Add Listener button. Select Interest Ranking, and then fill out the listener configuration:
- Enter a name for the listener, e.g. “Top sections”.
- Enter a description for the listener. Include the reasons for creating the listener, and score bonus points if you come back at the end to explain the decisions made when configuring the listener.
- Select the applicable channel(s) for the “Where” option.
- Enter a label if you like, or leave this entry blank for now.
- Select the profile property we created earlier.
The next option lets you enter "interests" that BlueConic can listen for within the content of your pages... but that's not the only way. You can also listen for interests dynamically. You define where the interests exist within the page, and BlueConic will add them to users' profiles.
Since this is a tutorial, and we don't know how you would be best off configuring your Interest Ranking listener, we'll start by explaining one way... and at the end of the tutorial, we'll point you toward other possibilities.
- We're going to enter static values into the "Interests" option, which BlueConic will listen for as users explore the Taylor-News.com site:

- We decided pretty early on that we needed to know the top three sections users are interested in. The "Expert Settings" is where this is configured, among other things:

The decay period controls how many days the interest data will stay in users' profiles. The threshold ensures that items aren't considered "interests" until they reach your defined score boundary. The last number tells the listener how many values should be kept in users' profiles. - We're going to leave the decay period at 90 days, change the threshold to 2 points, and set up the listener to store 3 values per profile.
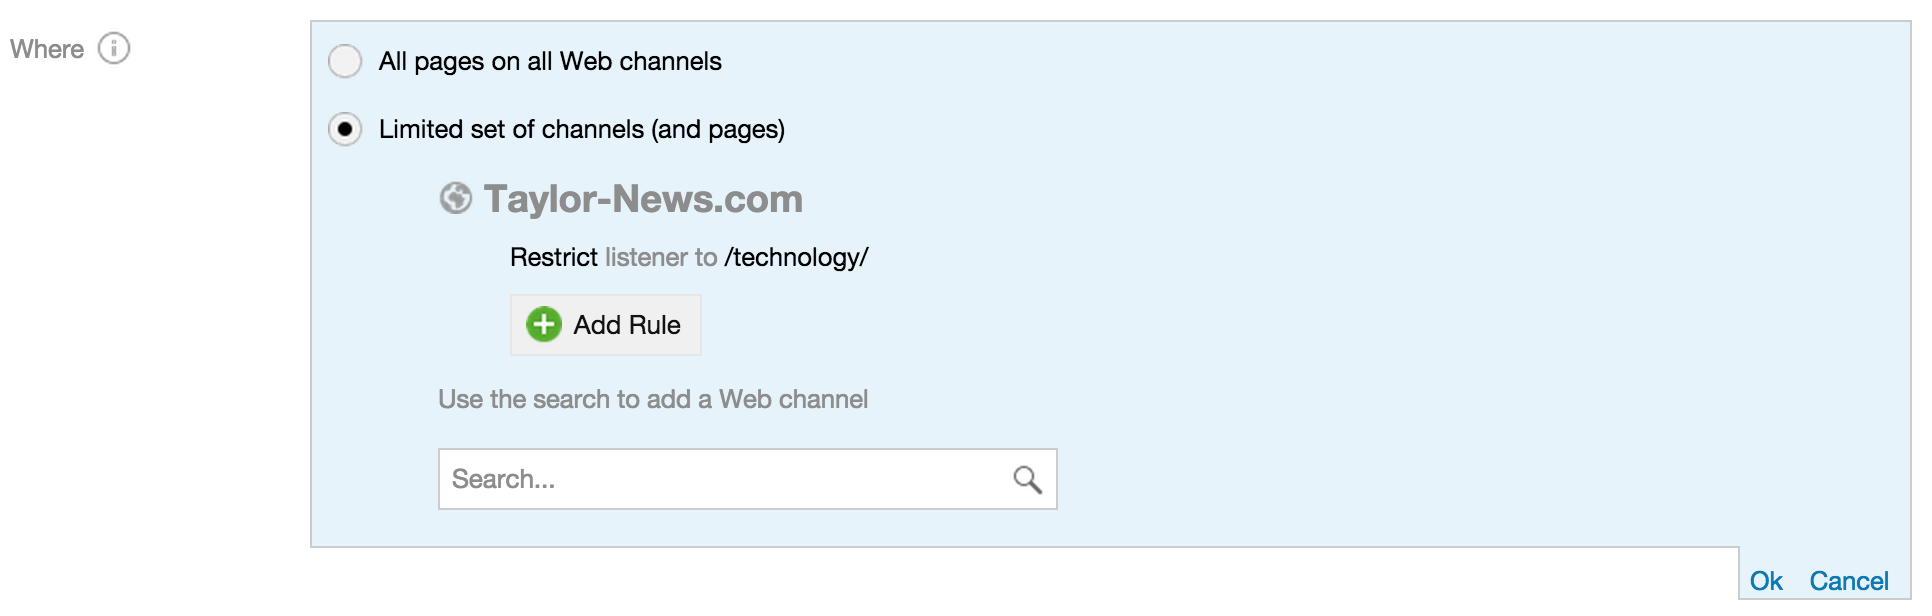
- With our interests defined, and knowing our URL structures, we can easily finish the job by adding a single URL rule:

What if we have hundreds of sections? Or, what if the available sections is subject to change over time? That's where defining where the interest lies within the page can be helpful. To approach in this way, you wouldn't enter anything in the "Interests" option of the listener configuration. Instead, when setting up the rule, you would select "interest based on selector" to define where the interests are coming from (see "each found interest" above). More on this later.
Configuring a Scoring Listener
That was use case #1. We still need to create the dialogues to inject our newsletter signup ads, but now we have a strong foundation of data to base the relevancy targeting on. This is a listening tutorial, so we're moving on to the next use case where we needed to configure a scoring listener to determine who is highly engaged with technology content.
Let's create another profile property to indicate whether users are highly engaged in tech content, users we hope to gather more data from to help us with product development and with driving more engagement. Without going through this one step-by-step, here's the image we ended up with after creating it:
With the profile property in place, it will only take another minute to add the Scoring Listener. Select Listeners from the BlueConic navigation menu, click Add listener, and select "Scoring" to begin.
- Give the listener a name. We chose "Technology scoring".
- Enter a meaningful description for the listener.
- Select the BlueConic channels the listener should run on. Optionally, define the pages the listener should run on. In our case, we are only interested in users who are on Taylor-Shop.com URLs that contain /technology/ -- it only makes sense to run the listener on these pages:
- Enter a label if you'd like, or leave this entry blank for now.
- Select the profile property you created earlier to hold your engagement score.
- Now for the fun! Scoring rules... the first rule is very simple: since we are running the listener on technology pages only, we can give users a point just for being there. Click Add rule (of type: Content) and set a number of points to give for page views:

- If there are other areas that could be clicked that users should get points for, set up rules for those as well (click Add rule after changing the type to "Click").

For these, again choose a number of points to assign to the score, and click "define click area" to select an item from the page (e.g. a comment submit button, or social sharing icon). - In the end, you'll end up with a multi-rule listener defined. Here's what ours looks like:

Next steps
Here are some thoughts for next steps:
-
Dynamic interest parsing (when you choose "interest based on selector" in interest ranking rules) is just as popular as manually defining the interests in listener rules. There are great use cases for each, but generally speaking you will want to use dynamic interest rules when there are dozens to hundreds or more of distinct interest values, or when you have no control/understanding of what you might need to store over time (e.g. changing inventory).
- Consider how recent the scoring or listening data should be and configure the decay period accordingly. There may be times when you need to store data with two decay periods. In these cases, you can use the "Save As" feature to copy the profile property and listener, making minor changes as you go.