In various parts of BlueConic, you can use the Visual Picker to create and select positions in a channel as well as to select areas and form fields for dialogues. Because it works visually, you do not need to use the more complicated jQuery selectors to define a position. The Visual Picker shows the content of the channel in real time and allows you to directly select on the part of the channel that you want. Within the Visual Picker, hyperlinks are active which means you can navigate throughout the channel to create/select positions. When you select a position, area, or form field, the jQuery selector for the position is added to the configuration of the item you are defining.
Before you can use the Visual Picker, at least one channel must be defined in a domain.
To use the Visual Picker, click its link in whatever part of BlueConic you are in where you can access the Visual Picker. For example:
Creating a position
To create a new position for a channel using the Visual Picker, follow these steps:
- Select Settings > Channels & BlueConic hostnames to open the list of available channels. Under Positions, click Add position. The new position appears in the list of positions.
- Select the new position in the list.
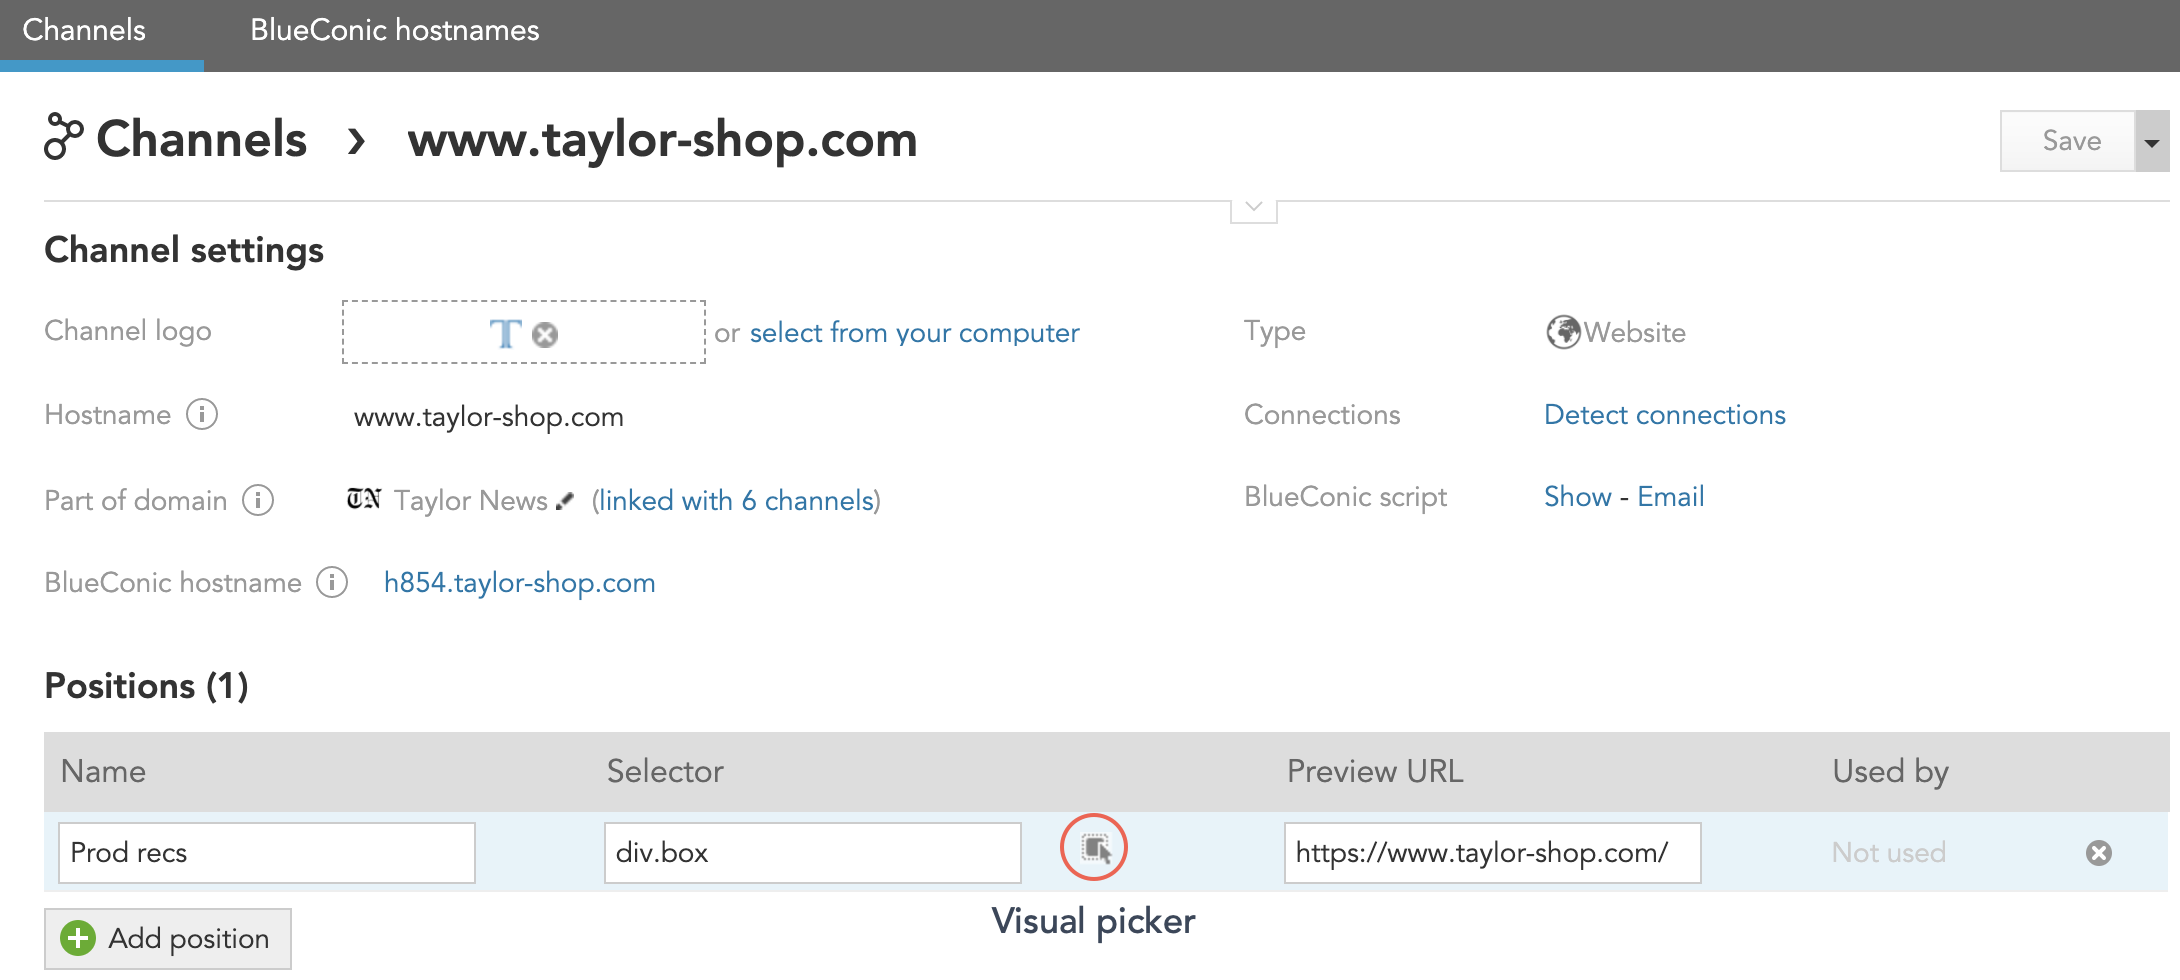
- To the far right of the "Selector" field, click the link for the Visual Picker. The Visual Picker lightbox appears containing the content present at the initial URL.
- Hover the mouse over the position that you want to create. Notice that as you move the mouse over the content that positions that can be defined become outlined by a dashed rectangle and a title bar appears above it. In the top left part of the title bar, the dimensions of the position are shown (in pixels), and in the upper right part of the title bar there are two buttons: Use this Position and Test. For example:

- To test the position, click Test. The position will be filled in with solid blue. This makes it possible for you to see the position without its current content, or if there is no content, to see the whole position clearly.
- To pin the position in place so that it remains selected, you can do one of the following:
- Click the pin icon.
- Click any area in the title bar (except Use this position and Test).
- Click in the outlined area (except the parts that are links).
This frees you up to move the mouse to other locations on the screen while still being able to see the position. To unpin the selection, you can do one of the following:
- Click outside of the outlined area.
- Click once more in any of the areas that allows you to pin it (pin icon, title bar, or in the outlined area).
Once you have pinned a position the Path tool appears; use this tool to refine the selected HTML element.
- To select the position, click Use this position. You will then return to the "Channel Positions" tab. The jQuery Selector for the position you selected will appear in the "Selector" field and the Preview URL field will be filled with the URL you were working at in the Visual Picker.
- To navigate to another URL, enter it in the URL field at the upper left part of the Visual Picker. You can only navigate to URLs that are part of the channel that you are defining positions for. See Navigating in the Visual Picker for complete information.
Selecting a position on a Dialogue's Where tab
For dialogues with a visual component, you must define the position on the channel where the dialogue will appear. To select a position for a dialogue:
- Optional: select a position from the "Position" drop-down list. Or, you can skip this step and immediately open the Visual Picker.
- Click the Visual Picker link next to "Position". The Visual Picker lightbox appears containing the content present at the initial URL. The positions defined at the current URL appear outlined with a dashed rectangle. In the following example, there are three positions currently defined (A, B, and C)
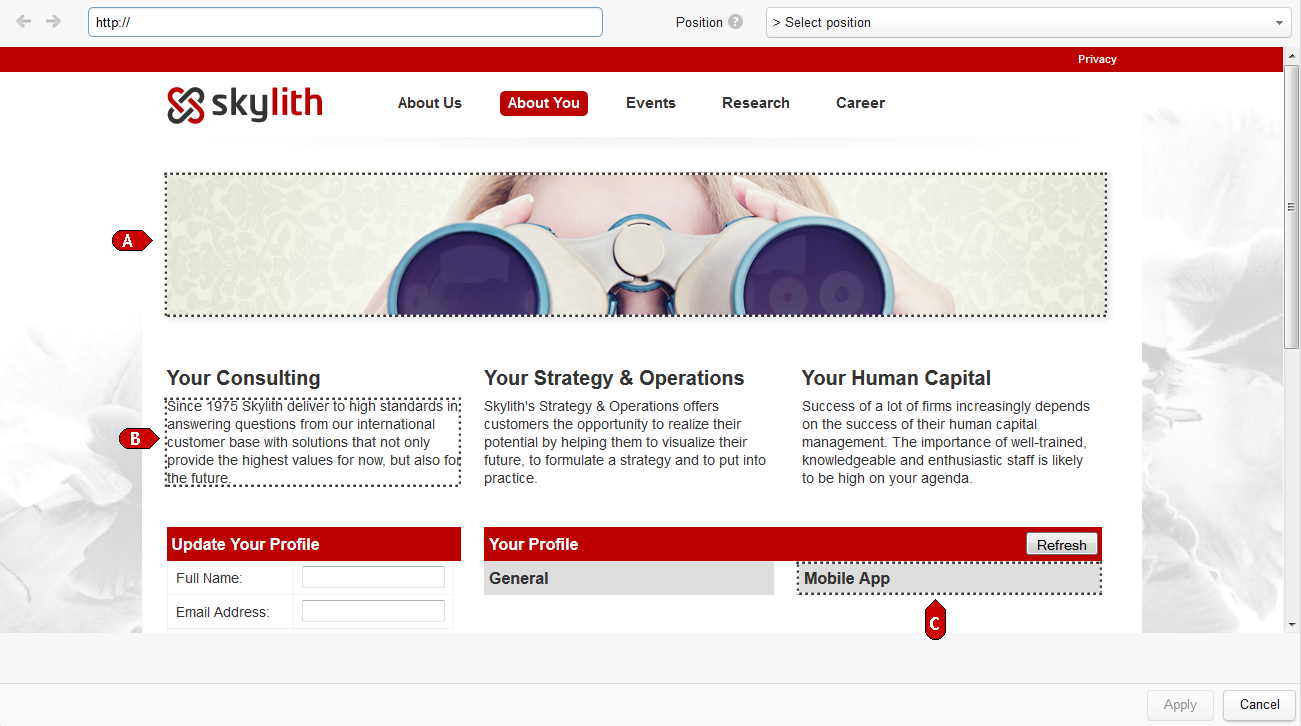
- Hover the mouse over any of the defined positions. A toolbar will appear along the top of the predefined position containing two buttons: Use this position and Test.
- To test the dialogue at this position, click Test. The dialogue's content displays at the current position. For example:
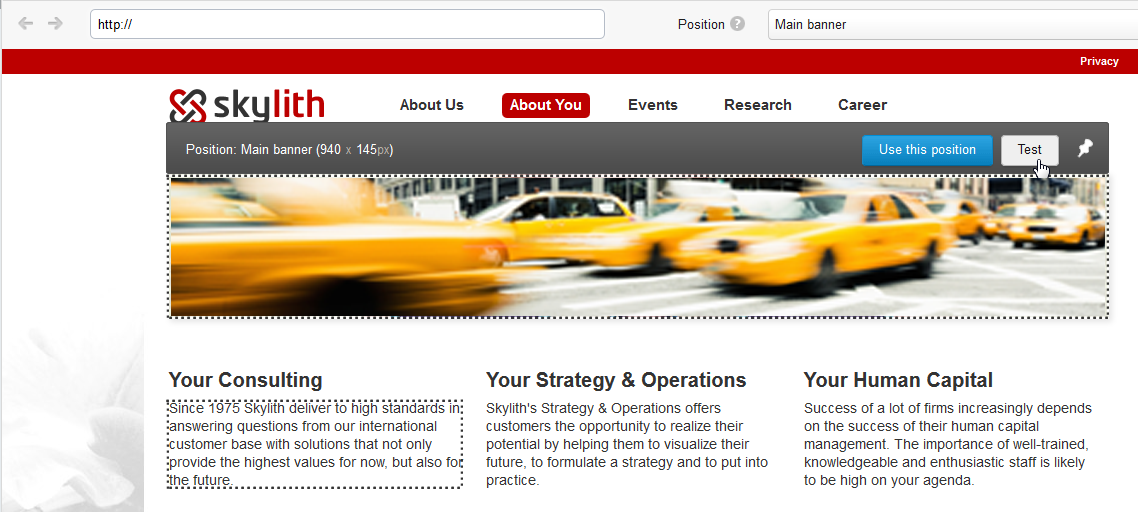
- To select the position, click Use this position. The position is selected, and you'll return to the Where tab for the dialogue.
- To pin the position in place so that it remains selected, you can do one of the following:
- Click the pin icon.
- Click any area in the title bar (except Use this Position and Test).
- Click in the outlined area (except the parts that are links).
This frees you up to move the mouse to other locations on the screen while still being able to see the position. To unpin the selection, you can do one of the following:
- Click outside of the outlined area.
- Click once more in any of the areas that allows you to pin it (pin icon, title bar, or in the outlined area).
- To navigate to another URL, enter it in the URL field at the upper left part of the Visual Picker. You can only navigate to URLs that are part of the channel that you are selecting the position for. See Navigating in the Visual Picker for complete information.
Position drop-down list
When you are selecting a position on a dialogue's Where tab, a drop-down list is available in the upper right part of the Visual Picker. All the positions that are defined in the current channel can be selected from the drop-down list. You can select any position that is defined for the current URL. Positions that are defined for the current channel but that are not available at the current URL are grayed out.
You can see the available positions by clicking the expand button next to the Position drop-down list. You can then select the position from the list. For example: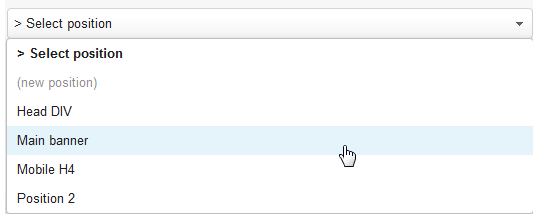
After you select the position, it will be outlined with a dashed rectangle with a toolbar above it showing its name and dimensions. For example: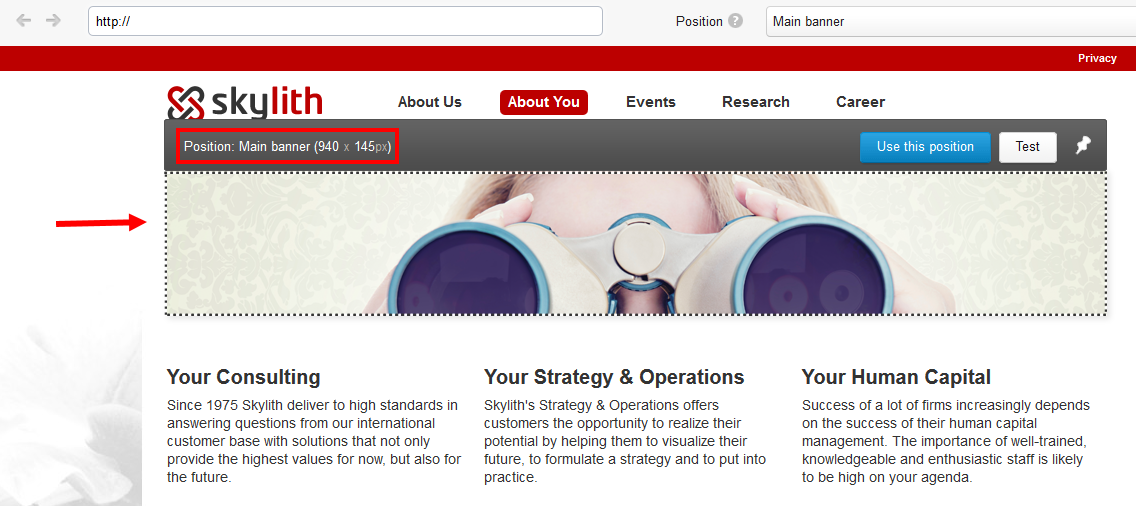
Selecting an area
For the dialogue's "Content" and "Click" conversion settings as well as dialogues for which you have to define areas, you can use the Visual Picker to do so. Follow these steps:
- Click the Visual Picker link under the "Selector" field where you are defining an area. The Visual Picker lightbox appears containing the content present at the initial URL.
- Hover the mouse over the area that you want to select. The available areas that can be defined are outlined by a dashed rectangle when you mouse over them and a title bar appears with the button Use this area. For example:
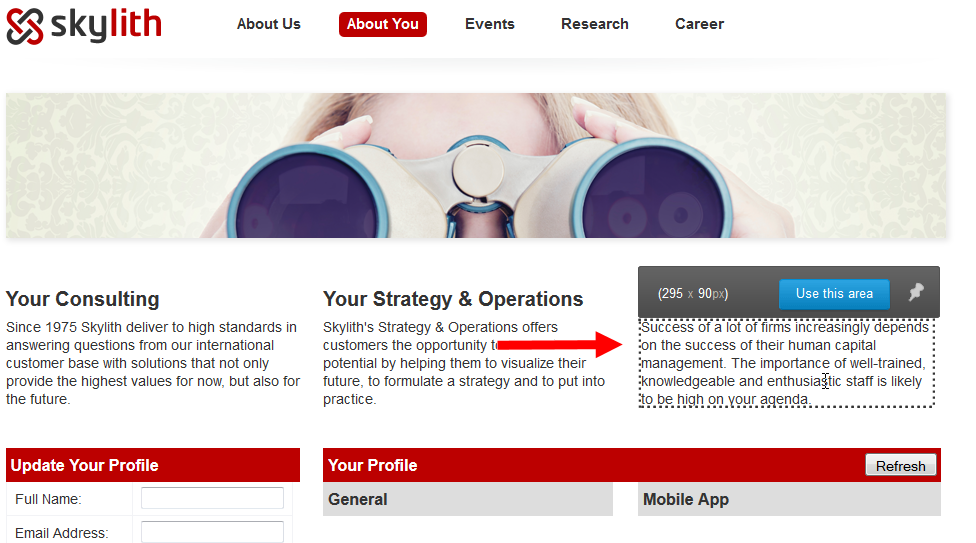
- To select the area, click Use this area. The area is selected.
- To pin the toolbar above the current area, you can do one of the following:
- Click the pin icon.
- Click any area in the title bar (except Use this Position and Test).
- Click in the outlined area (except the parts that are links).
This frees you up to move the mouse to other locations on the screen while still showing the selected area. To unpin the selection, you can do one of the following:
- Click outside of the outlined area.
- Click once more in any of the areas that allows you to pin it (pin icon, title bar, or in the outlined area).
- To navigate to another URL, enter it in the URL field at the upper left part of the Visual Picker. You can only navigate to URLs that are part of your channels. See Navigating in the Visual Picker for complete information.
Selecting form fields
For the Form dialogue type, you can add values from form fields to a visitor's user profile. To select a form field using the Visual Picker, follow these steps:
- Click the Visual Picker link under the "Selector" field where you are defining a form field. The Visual Picker lightbox appears containing the content present at the initial URL.
- Hover the mouse over the form field that you want to select. The available fields that can be defined are outlined by a dashed rectangle when you mouse over them and a title bar appears with the button Use this form field. For example:
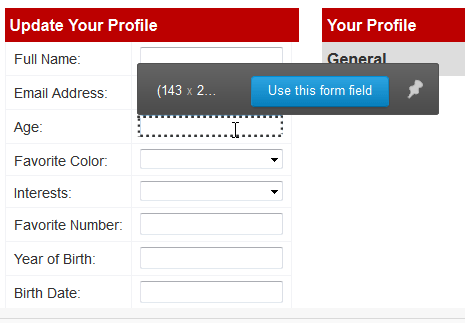
- To select the field, click Use this form field. The field is selected.
- To pin the toolbar above the current form field, you can do one of the following:
- Click the pin icon.
- Click any area in the title bar (except Use this Position and Test).
- Click in the outlined area (except the parts that are links).
This frees you up to move the mouse to other locations on the screen while still showing the selected form field. To unpin the selection, you can do one of the following:
- Click outside of the outlined area.
- Click once more in any of the areas that allows you to pin it (pin icon, title bar, or in the outlined area).
- To navigate to another URL, enter it in the URL field at the upper left part of the Visual Picker. You can only navigate to URLs that are part of your channels. See Navigating in the Visual Picker for complete information.
Using the Path tool
When creating positions and selecting areas, the Path tool can be used to exactly define the HTML element you want to use for a position, area, or form field. The Path tool appears beneath the URL field. It shows the parent/child structure of the selected HTML element from left to right. For example:
The currently selected HTML element appears in blue. When you mouse over an HTML element in the Path tool, a tooltip appears with details about it. For example:
You can navigate throughout the parent-child HTML structure by clicking a part of the path. When you do so, the new HTML element is selected and is outlined with a dashed rectangle below. For example: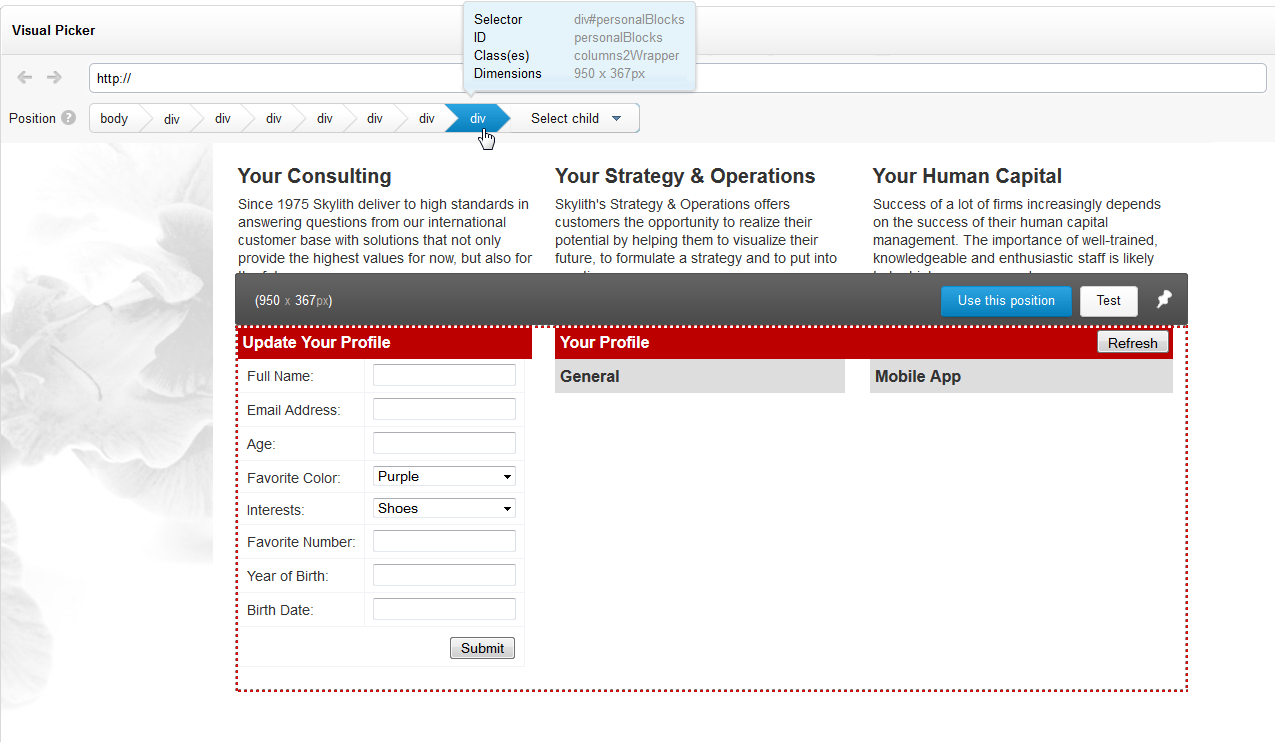
If you have selected a different HTML element in the Path tool, a "Select Child" drop-down will become available if the selected HTML element contains more than one child element. This allows you to select one of the child elements of the current HTML element. For example:
Navigating in the Visual Picker
When you are in the Visual Picker, all hyperlinks are active, which means that you can navigate throughout your channel to select positions, define areas, and so forth. At the top left part of the Visual Picker, a Back button and a Forward button appear which work in exactly the same way they do in a browser. You can also navigate to a URL by manually entering a URL in the URL field to the right of the back/forward buttons.
You can only navigate to URLs that are part of your channels. If you enter a URL that is not part of your channels, the URL field will be highlighted in red. The URL field will also be highlighted in red if the URL you navigate to is not running the BlueConic script. For example:
Click the red question mark (?) to see the message detailing the error you have encountered.
Initial URL opened by the Visual Picker
The initial URL opened by the Virtual Picker depends on where in BlueConic you are working and what specific settings have been defined. The table below explains how the initial URL is selected. For each part of BlueConic, the order that the Visual Picker steps through from top to bottom to determine the initial URL is explained. The Visual Picker opens to the first valid URL that is found.
| Location | Initial URL |
|---|---|
| Channel Position tab |
|
| Where tab of a dialogue interaction or optimizer |
|
| Conversion setting for a dialogue interaction or optimizer |
|
| Enrich Profile by Visitor Behavior dialogue interaction/optimizer |
|
| Enrich Profile by Visitor Input dialogue interaction/optimizer |
|